Showing posts with label healthy. Show all posts

Thursday, April 29, 2010

Grilled Asparagus.... yum!

Grilled asparagus is so easy to make.  Yummy to eat!
This is another one of those easy to prepare dishes that scream "gourmet!"  If your company or family like asparagus, they will love this.  It's also very healthy because you are not losing nutrients in water.  The good stuff is sealed in!  Plus, I eyeball the stuff going into the marinade instead of measuring.  But that comes with practice, and you will be able to do the same.
So, let's make it. 
Wash a handful of asparagus at a time, getting off any loose pieces at the head or areas that have become a bit mushy, and let them drain on a paper towel.  I leave the bands on but moved them to the bottom of the stalks so the bunch can stand up to drain.  While they drain, get out a gallon sized zip bag and place the following ingredients in.  Zip bags are an essential in my kitchen. They make life so much easier.

~1/2 cup good olive oil
~1/4 cup snipped parsley leaves and smaller stems (can be chopped also)
~1 Tbsp  minced garlic (I like the big jar of Gilroy grown garlic that is pre-minced)
~1/2 tsp  salt and pepper (I use only fresh ground and the blend is my fav)

These ingredients are based on two bunches, though it should accommodate more if you add a little bit more oil.  There are three bunches of medium sized asparagus in the picture above.  Small stalks can work, but they can so easily fall through the grill bars.  Large stalks can be use quite easily if you can get them.
This can all be done 2-3 days in advance if you like, however I prefer marinade mine only a few hours before dinner.  Squish all the ingredients together in the bag after it has been tightly sealed, then add the relatively dry asparagus after the bottoms have been snapped off, or you can cut 2-3 inches off.  The ends are just too fibrous to enjoy as much.  Zip the top closed again, getting most of the air out, and work the ingredients around so all sides of each stalk of asparagus is in the marinade.  Let it sit on the counter if you are making it the day of use, otherwise place it in the refrigerator and turn it every 6 hours during the time you are awake.  If you forget, no worry, just get it out the day of use and turn the bag over as often as it's convenient. 

Lay the asparagus across the grill bars as shown, trying to make only one layer.  The heat should be turned to medium-low for this.  Turn every 3 or 4 minutes with flat tongs or a spatula, and only 15 minutes or so is needed on the grill to be cooked to perfection.
And that's it!  They are ready to eat.  If they come off of the grill before dinner is done, just put them in the oven on the lowest setting possible to keep warm.  I will marinade this a day or so ahead of taking it on a camping trip which makes it so easy to have a gourmet meal on the road!  The potatoes can also be done in this fashion.

You ask what kind of wine goes with asparagus, well, not many when it's steamed, but I think a good Zin or Malbec do just fine.  But this is not the core of the meal, so look for a wine that goes with the other items on your menu for the night. 

Wednesday, April 28, 2010

Grilled potato and pepper dish.

Ah... Spring has sprung, and I adore flowers.  I seem to have a knack with orchids as long as they are the thicker leaf type.  But wait ...you will also get to see my tips for growing food in containers very soon.
Right now though... let's talk about easy, and I mean EASY, potato and baby bell pepper side dish.  One of the things I love most about this time of year is the grill. It's my best friend when it comes to cooking in the spring, summer, and through most of fall.  I'll talk about the other grilled veggies and meats during the next few months, so stay tuned! 

So.... let's cook! 
The items you put into this dish can range from potatoes, onion, peppers, squash of all kinds, and even sausage slices, plus a ton of other items.


Here you have baby vidalia onion and a sweet onion, baby bells, red potato, garlic, and you could even add the asparagus (though it is being marinaded to be placed directly on the grill). 

Slice the onions into somewhat larger pieces, or if you prefer they can be smaller, however they have a greater chance of burning if they are diced.  The peppers I just leave whole or cut them in half after removing the stem.  The small red ones will be kept with the stem on for my recipe. 
The potatoes need to be washed  thoroughly with running water on the out side to remove any dirt.  Cooking will take care of any germs.  Remove any dark or brown areas with a pairing knife.  One large or two medium potatoes per person is what I base my calculations for servings.  Slice the potato in half length wise, then make wedges, cubes, or what ever shape you like.  Red potatoes seem to take a little longer to cook, so they can be long, but not more than an inch wide generally.  Nothing needs to be exact in this kind of cooking.  That's why it's so easy.  This is one of my camping recipes.  It can be made on any fire or in any oven. 

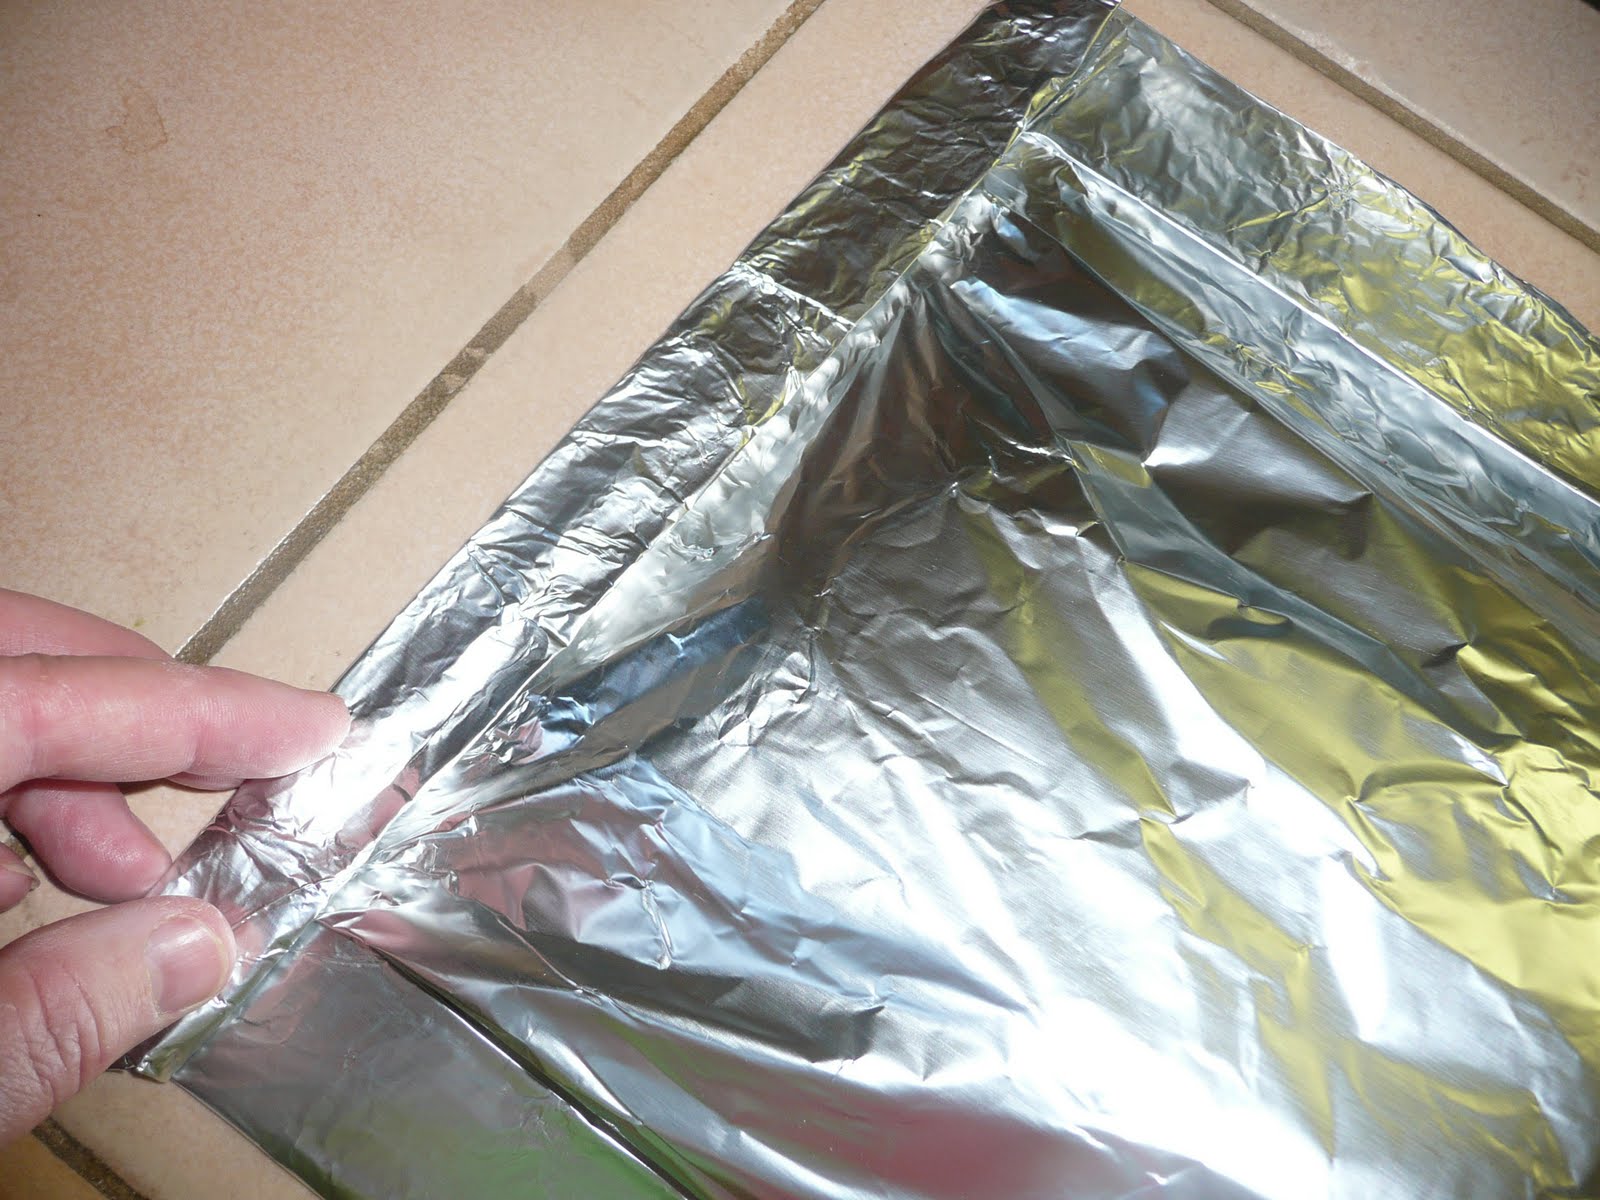
Unfortunately, the picture of the aluminum foil is not the greatest, but you can click to make it larger.  Put two layers of foil together and make it like a "trough" that will hold the veggies while you add ingredients to it.
Once you have the trough, you can safely add the onions, peppers, seasonings and potato, along with what ever else you want in this side dish.  Here I have added Italian seasonings (Tuscan), minced garlic (can also be added whole if you like), salt and pepper to taste.  If you add a seasoning blend that has salt as one of the top 3 in the list of ingredients, hold off and let everyone re-season their own.  Add a good olive oil (and as always, I like the Spanish olive oil best), drizzling it over the top of everything in the foil.  Next, add the potatoes.
Then drizzle with a little more olive oil to the top of this.  You may add more seasonings here, but it's usually not needed. 
I add two more pieces of foil, the same size as the bottom layer, over the top of the ingredients, however just one can work if you don't flip the packet of veggies over.  I like to keep that option.  On the long end closest to you, smooth the layers of foil, ensuring there is no vegetable under this edge.  Fold it over once, then fold that fold in half.  This creates a nice seal.  Do the same to the opposite long side.  Once you have the long sides done, it is easier to do the ends.  I give the ends an extra fold.  Once this is accomplished, shake the packet back and forth.
Hold both ends while you shake the package back and forth to mix the ingredients and spread the oil.  This packet can go directly on the grill that is on medium heat, in the oven at 350-375, or directly on a well watched fire edge (coals can be placed on top, however this is quite messy, but makes for a more even heat).  Do not put it in the middle of a camp fire as the foil may break apart from the extreem heat.  About 30 minutes is usually all you need for the potatoes to cook, as they will be the slowest to be ready.  Be EXTREEMLY careful in opening this packet!!!  The steam will burn you!  Let the packet sit for 5 or 10 minutes while you are finishing up your main meal.  If you have added sausage, you don't need anything else, except maybe a nice wine or beverage.  Speaking of wine..... a good Rioja from Spain would go great with this dish, as well as their Tempranillo.  Altos Del Cuco makes a nice blend of Monastrell, Syrah, and Tempranillo, for around $10.  Calina also makes a nice Carmenere, from Chile that would go well, also for around the same price.  There are many options with this dish, so consider the meat you will be having with this also.  See my last post for the wine we had with this meal.  If you have a good beef or buffalo steak, think a big, bold, Cab, or a juicy, brawny Merlot (mer-Low), as well as the other wines mentioned.  With fish or chicken, or wild bird, think Pinot Noir that is rich and jammy.
Enjoy and have fun cooking!

Tuesday, April 27, 2010

Spring lamb dinner!

It's the time of year to find good lamb in your meat department.  I prefer Colorado lamb, though it could prove to be difficult to find if you don't live in Colorado.  You can still have a nice spring dinner however with regular lamb (from New Zealand).  The picture to the right shows the dinner from last night, and it's all done on the grill.  If you don't have a gas grill, it may be a little trickier, but can be done.  My grill gets used every season of the year.  Yes, even when there is a foot of snow on the ground!  Gas grills are easy to use anytime if you have it on a porch, in the carport, or on a covered deck.  And you don't need to buy charcoal or lighter for it, so it saves money in the long run.  The flavor it adds is priceless!
So, whether you are cooking on the grill, or on the stove and oven, here is what you need to do.  A day or two before cooking the lamb roast (or a rack even), using a large plastic zip bag, put 1 cup of wine, 1/2 cup of good olive oil, 1/4 cup chopped or minced garlic, 3 Tbsp of rosemary or rosemary type seasoning (such as the rosemary dipping seasoning), or 4 large sprigs of fresh rosemary.  Grind 1 tsp or more of pepper, and add a 1/2 tsp of salt if you did not use the dipping seasoning.  Lock the bag closed and squish all the ingredients together using your hands.  Open the bag and place the meat inside, carefully close the bag being sure to get most of the air out, then turn the bag several times to get the seasonings into every crevice of the meat.  Place the bag with the meat into the fridge, and turn one or two times a day to be sure every area gets it's turn in the marinade. 
On the day you plan to cook, get the meat out of the refrigerator 30 minutes in advance, giving the meat time to warm a bit before placing on the heat.  15 minutes prior to cooking, heat the grill on high.  After getting the meat out, and while the grill heats, start on the other items you plan to have with dinner.  I made potatoes with baby bell peppers and onions, grilled asparagus, and baked jalapeno (~ over the n) peppers (pronounced "hall-a-Pen-yo"). 
Whether cooking on the grill, or in a pan, the roast needs to be seared on every side, every area.  This will keep the juices of the roast in, as well as keeping it more tender and flavorful.  Be careful not to over cook a good lamb roast.  It loses flavor if you do.  Medium or medium rare is best.  Remove the roast from the bag (marinade may be retained to make a sauce/gravy if you like). Sear the roast on medium to medium high for both types of cooking (using one tablespoon of grapeseed or sunflower oil in the pan).  Once you have that done, turn the heat to medium low for the grill or stove-top, or 325 for the oven.  Let the roast cook for 10 minutes, then turn to the opposite side when grilling.  On the stove, turn once after 15 minutes, and no turning is necessary if braising in the oven (covered).  When cooking on the grill, you will need to check it every few minutes to insure it's not being burned by fire.  A little is ok, as you can see above, but only a small amount can be tolerated before the meat becomes over charred and uneatable.   You will need to use your judgement on how done your roast is.  Never, ever, cut the meat open to see if it's done.  You will lose the juices you so carefully tried to keep in when you seared it, and the meat will become dry.  Practice makes perfect.  If someone wants their slices more cooked, do it after it has been sliced.
  Once done, using spoons or spatulas, carefully transfer the meat to a cutting board to sit for 2-3 minutes.  You can cover it with tin foil if you like to keep some heat in, but I find it unnecessary.  This is called "letting the meat rest" so the juices will remain in the meat.  Otherwise it will drain out and be dry and less flavorful.  Once it has rested, it's ready to slice.  Using the bone as a guide, cut as close as possible to the bone to divide the roast in half.  Turn the sliced side down so you can cut across the grain for further slicing.  Do the same with the other side.  Retain the bone for stew.  The roast will be pinkest next to the bone.  So don't panic.  If it's too rare for someone, sear the slices for a minute on each side in the oils, or without oil on the grill.  Serve with jelly or preserves.  I like the berry and chilies jams, or marmalade with jalapeno.  Click on the top picture then enlarge the label viewing.

Most of this meal can be prepped ahead of time, which makes for a great, easy to do meal for guests or family.  For this meal, I marinaded the meat, then prepared everything else while I was waiting for the meat.  Enjoy!

The wine: Many reds will go with this meal.  Burgundy is the classic pairing, and some French wineries have a sheep on their label.  Other red wines that will go with this, in my opinion, are Syrah/Shiraz, a good Zinfandel, Merlot (mer-LOW), or a berry bright Pinot Noir.  The wine I chose for this meal was a blend of three grapes, Zinfandel, Merlot, and Cabernet Sauvignon.  Thus, the winery calls it Menage a Trois (twa).  It has a fresh, ripe, jam-like fruit, spice, and well integrated flavors to drink with or without food!  What a lovely blend from California!  2008, for $10!!!  What a steal!

Sunday, April 4, 2010

Speaking of Buffalo....steak!

Buffalo steak is my favorite of all steaks.  Next comes dry aged beef, but it usually contains more fat (marbling) than that of the buffalo.  That fat that you do see is easily cut off the meat you want to eat.  So, how do you make a buffalo steak tender?  Well, I turned to a professional chef and friend, Henri (French).  He marinades them in olive oil!  Ah ha!  Ok... so I also like some good flavors, like pepper freshly ground, a good salt, and maybe even some seasonings of another kind.  What kind?  Well, there are many ways you can go with that.  Some that I like a lot are the dipping spices that you'll find for using with olive oil to dip bread in.  They work quite well and are so very easy!  When I use one of these however, I'll use less or no salt.  Another is the little "grinders" that you find in the spice department of the grocery store.  There are several good ones to choose from.  I like the "steakhouse" and the "Italian"  for steaks.  Many more seasonings are out there to try, and you just need to think of what kind of seasonings you like.  Also take into account what kind of wine you will have with it if you go for something exotic. 
Now that we have the seasonings figured out, let's get to fixing.  Get a large zip bag, put the seasonings in, then pour about 1/3-1/2 cup of good olive oil in (and as I've said before, the Spanish oil is my favorite).  Squish the ingredients together using one hand while holding the top of the bag with the other.  Place the steaks in and let them rest in the bag for up to 4 days in the refrigerator, turning and rearranging the bag occasionaly each day so the steaks are getting the full benefit of the seasonings.  Take the bag out of the refrigerator at least 30 minutes before cooking if possible.  This allows the meat to warm a bit before being placed on the grill. 

Place the steaks on a paper plate to allow some to the oil to be shaken off or patted dry, if you prefer, with a paper towel.  I usually just take mine straight from the bag, however a bit of practice is involved to keep from getting a lot of flame.  If you want a nice "cross-hatching" burn on your steak like you get in finer eating establishments, turn the steaks 1/4 turn after the first minute on one side, then do the same for the other side after you flip them.  Buffalo is best served medium-rare but medium will work ok also if you like yours done more.  A medium heat is all you need once the grill is good and heated.  If you get too much flame, just move the steaks.  Let every steak you serve "rest" for 2 minutes before putting a knife to them.  The juices will stay in the meat this way, instead of flowing onto the plate.  No one likes dry steaks!

Ah the wine!  This was a pretty special "Cab."  Click to make the picture larger, and then click on the bottle if you would like to see the label better.  It is one of my favorite California wineries to visit, and the wine is pretty darn good too!  This 2006, Sterling Vineyard, multi-county blend, is made from three different counties in California.  88% of the grapes come from Napa, 8% from Sonoma, and 4% from Lake.  I want a case please!  What a great wine with this meal.  It not only went well with the steak, but also the scalloped eggplant and potato casserole.  A bold, brawny, juicy, berry-lishous wine!  This wine was opened 30 minutes prior to the meal in order to let the wine "brethe" in the fresh air and lose some of the tannin flavor.  A well rounded wine that could go for many more years of cellar aging, ..... if you can keep your hands off of it that long.

Friday, February 26, 2010

Avocado and Tomato Salad

Quick, Easy, and Healthy!
One of the easiest salads you will ever make!   This is a recipe that one of the sales ladies asked me for when I was in Mexico, at the Pueblo Bonito Emerald Bay.  Jessica, this is for you.


Start with ripe, buttery Black Hass avocados.  Using the same technique that I described to make guacamole, remove the seed.  While the avocado is still in it's shell, cut the tender flesh into cubes by slicing one way, then the other, avoiding cutting through the shell. 
Lift the avocado cubes out by running a round ended knife around the edge and gradually working the pieces out from the shell.  It takes a couple of times to get the hang of it, but it's really quite simple.  The wider the end of the knife, the easier it is.  Place the avocado, sliced tomatoes (I like the Campari tomatoes that are on the vine and in a plastic container), and what ever else you would like in the bowl.  In the picture above, I cut up one of the little cippoline (chip-ah-LEE-nee) onions.  They are about 2-3 inches across and are flat.  The flavor is sweet and mild, so this makes for a nice addition to most types of salad.  The one used here was red, which is difficult to find, but I found it at the Whole Foods market.  Fresh basil or parsley leaves are also a nice addition and healthy.

The last step is to mix in your favorite dressing.  In the first picture above, you can see that I used roasted yellow bell and serrano pepper dressing from Cindy's Kitchen.  It is also available at Whole Foods.  If you would like to make your own dressing, try 1/8 cup of olive oil (use a good one) and 1/4 cup of balsamic vinegar.  I like a good 20 year or so balsamic.  It gives the dressing a slight sweetness.  "Elsa" brand aged balsamic is very good and a reasonable price.  Another one you might consider is a flavored balsamic.  There are many different kinds, such as blueberry, or one I like from Wine Country Kitchens.  It is vanilla-fig balsamic.  Very tasty in dressings.  Add a little dressing at a time until you have a light coating of the vegetables.
Season with salt and pepper to taste in your salad, toss, and serve.
This is a very easy salad to make when you are RV'ing or staying at any of the Pueblo Bonito Resorts. 

Enjoy Jessica!  See you next year.


Thursday, February 18, 2010

Ceviche in Mexico!

No matter where we go in Mexico, we love the food!   When we go to a place that has beach, I have to have fresh ceviche.  Call it a passion, or just plain good eats.  It's very health for you and it tastes great.  Now where the unhealthy part comes in, I love mayonnaise with mine.  A mexican friend in Cabo showed us how to eat it there, and we've been loving it that way since.  My recipe is very easy, however there are many different seafood that can be put into the mix.  We've had it with octopus, squid, crab, conch, and other shell fish, but shrimp is usually the most widely available.  There are several different kinds also.  The different regions have there own twist or tradition in making this lovely dish.  So if you want to experiment... go for it.  But you must remember one thing, the lime is the cooking agent, so if you decide to smother it in cocktail sauce, be sure to let the seafood and veggies cook in the lime juice. 

Jerry likes to eat his on the saltines that they serve with the ceviche, however I like mine with the tostada shells.  If I can't get the tostadas, I use tortilla chips which work almost as well.  Some places in the US give it to you to just eat with a fork, and that's fine too. 
Ah, but now it is time for me to go cook.  Enjoy!

Wednesday, February 17, 2010

Ceviche!!!

Ceviche made easy and healthy!

This really is an easy dish to make and the ingredients are so healthy for you. 

Start with the tomatoes, approximately 2 large or 5 medium small ones.  Personally, I like the ones that come in the clear plastic "clam shell" containers, and the stem is still attached to the tomato.  They taste most like the tomatoes in my deck garden.

Cut the tomatoes from the top, to the bottom.  This keeps the "meat" inside from oozing out.  Remove the "meat" (seed area of the tomato) and place in a small dish to be used with pasta or other dish.

Dice the remaining outer area of the tomato and place in a quart sized bowl or a little larger.  The bowl needs to be deep, not wide.  Chop a small red onion, or 1/2 of a large one in to fine pieces (just smaller than the tomato as seen above).  Place it in the bowl with the tomatoes. 

Using fresh, clean, cilantro, dice approximately 1/8 of a cup and place it in the bowl with the other ingredients.

Thaw and thoroughly rinse one bag of shrimp with the tails and shell removed, in a colander and leave in the sink to drain.

While the shrimp is draining, squeeze 2 cups of lime juice or enough to cover all ingredients in the bowl (including the shrimp that will be chopped and placed in the mixture).  Do not use store bought pre-squeezed, lime juice.  The results are not the same.

Once the shrimp is drained, slice the shrimp in half lengthwise, then cut to about 1/2 inch slices.  They should be roughly the size of your thumb nail.  Place these in the bowl with the tomatoes and other ingredients. 

Add 1/2 tsp - 1 tsp of chili powder, depending on how spicy you would like it, to the mixture in the bowl. Do not add salt or pepper.

Add enough lime juice to cover the shrimp and diced vegetables, mix thoroughly, then place it in the refrigerator for 20 minutes, stirring once after 10 minutes to insure all the ingredients are getting the full benefit of the lime juice.  At this point, the lime juice is "cooking" the shrimp.  You can use pre-cooked shrimp, however for the best results, use uncooked to make this recipe.

Serve in the same bowl, put it in a fancy bowl, or do as I did... place two medium sized, clean, cabbage leaves together with the stems overlapping, to form a bowl.  Place one more under the two and place this all in a cereal or soup bowl.  Add your ceviche a spoonful at a time at first, then pour the rest into the leaf bowl and garnish as you like. 

We like to eat ours on tortilla chips with mayonnaise (as we were taught to do in Cabo San Lucas).  A little hot sauce if you like can be added on top of each chip, and yum.. something awesome. 

Hope you enjoy this dish as much as I do.  Of course we had tequila with ours.  Margaritas are naturally the best with this kind of mexican food.